Pattern Description:
The Barr Emerger is high on my list of favorite flies. A simple concoction of feathers and dubbing, this simple pattern is an all-around great fly. The idea behind this pattern, according to John Barr, was to imitate the adult insect creeping out of the nymphal shuck. Originally John tied this pattern to match Pale Morning Duns after a day on Nelson’s Spring Creek. The original pattern, too, was tied on a dry fly hook (TMC 101) and meant to be fished dry to rising fish. The pattern I present here is the wet version, meant to be fished below the surface, anywhere from stream bottom to an inch under the surface. This is also the color variation meant to match the common blue wing olive hatches we see out west on a regular basis. I would say that the wet BWO version is the most popular variation, and is the one I fish most often. I typically fish the Barr Emerger as I would any nymph; down along the bottom with a split-shot on the leader and an indicator above, or as a point fly in the Hopper/Copper/Dropper system. There is no reason not to have some of these in your box. They are so quick and easy to tie and use cheap, readily available materials to boot. Get to work.
Materials Needed:
Hook: TMC 2487 or 2488 (H) #16-24
Thread: 8/0 Iron Dun
Tail: Brown Spade Hackle Fibers
Abdomen: Olive Brown SuperFine Dubbing
Wingcase: Dark Dun Spade Hackle Fibers
Thorax: Grey Muskrat or Beaver Dubbing
Legs: Leftover tips of wingcase fibers
Step 1
Attach the thread and wrap a base back about halfway down the bend of the hook.
Step 2
Prepare a brown spade hackle feather by stripping the fluff from its base and preening the fibers against the direction of growth to make them stand up at a ninety degree angle to the quill. Spade hackles are found on the edges of a dry fly cape, right around the widest part of the neck.
Step 3
Cut or peel about ten or twelve fibers from the brown spade hackle and place them at the bend of the hook. Do not worry about the length, as they will be cut later. Tie the fibers in at the end of the thread base with a couple tight turns of thread. Be sure not to flare the fibers, as, rather than a tail, they will imitate the shuck of the nymph.
Step 4
Wrap forward from the bend over the butt ends of the hackle fibers to the sixty percent point on the shank. Clip the remaining butt ends of the fibers off at this point.
Step 5
Dub the thread with olive brown SuperFine dubbing and form a tapered abdomen from the base of the tails to the seventy-five percent point on the shank.
Step 6
Wrap the thread so it overlaps onto the front of the dubbed abdomen back to the sixty percent point.
Step 7
Prepare a dark dun spade hackle feather as you did with the brown one for the tail. Peel a dozen or so fibers off of the dun feather and tie them in by their butt ends at the front of the abdomen. Wrap over the butt ends to smooth out the base and clip any remaining butts off flush.
Step 8
Dub the thread with the grey beaver dubbing (think thin) and begin wrapping it at the rear edge of the index point, working back toward the base of the wingcase. Wrapping the dubbing from front to back like this will make it easier to build the ball shape we need and keep the dubbing from falling off the shoulder on the thread base.
Step 9
Continue dubbing back to the base of the wingcase, then work the dubbing forward again forming a ball-shaped thorax. You should end with bare thread hanging at the back edge of the index point.
Step 10
Pull the dun hackle fibers forward over the top of the thorax, forming the wingcase, and tie them down with a couple turns of thread at the index point.
Step 11
Detail of wingcase. Be sure to pull the fibers tight before you tie them down.
Step 12
Pull half of the remaining tips of the wingcase fibers back along the far side of the hook and bind them in place with two tight turns of thread.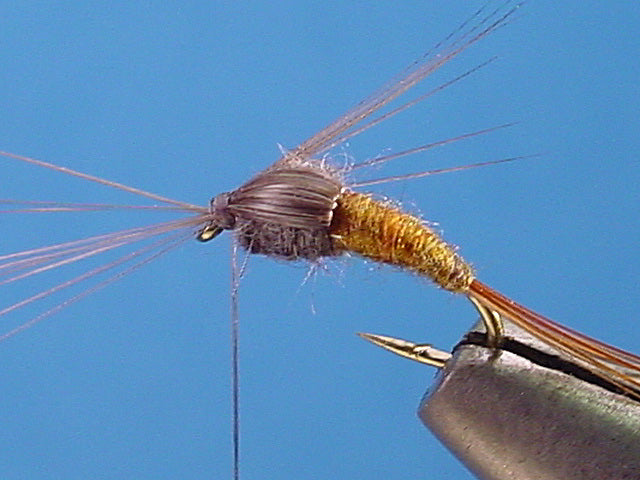
Step 13
Pull the other half of the wingcase fibers back along the near side and bind them down as well. Be sure the fibers are along the SIDE of the hook, not below or above it.
Step 14
Build a smooth thread head and whip finish at the index point.
Step 15
Trim the legs so they are equal in length to the wingcase. Trim the tail to about a half shank long.
