Here’s a cool little foam dragon pattern I have been playing with lately. I think it will work nicely on our local bass ponds and is a pretty quick and easy tie. I must admit I haven’t thrown this one in the water just yet, but the thing looks so cool I just had to share it. Let me know what you think…
Materials Needed:
Hook: TMC 100 #8
Thread: 6/0 UNI Blue
Abdomen: Loco Foam
Wings: White SuperHair
Thorax: Blue Antron dubbing
Eyes: Black Mono Eyes
Step 1
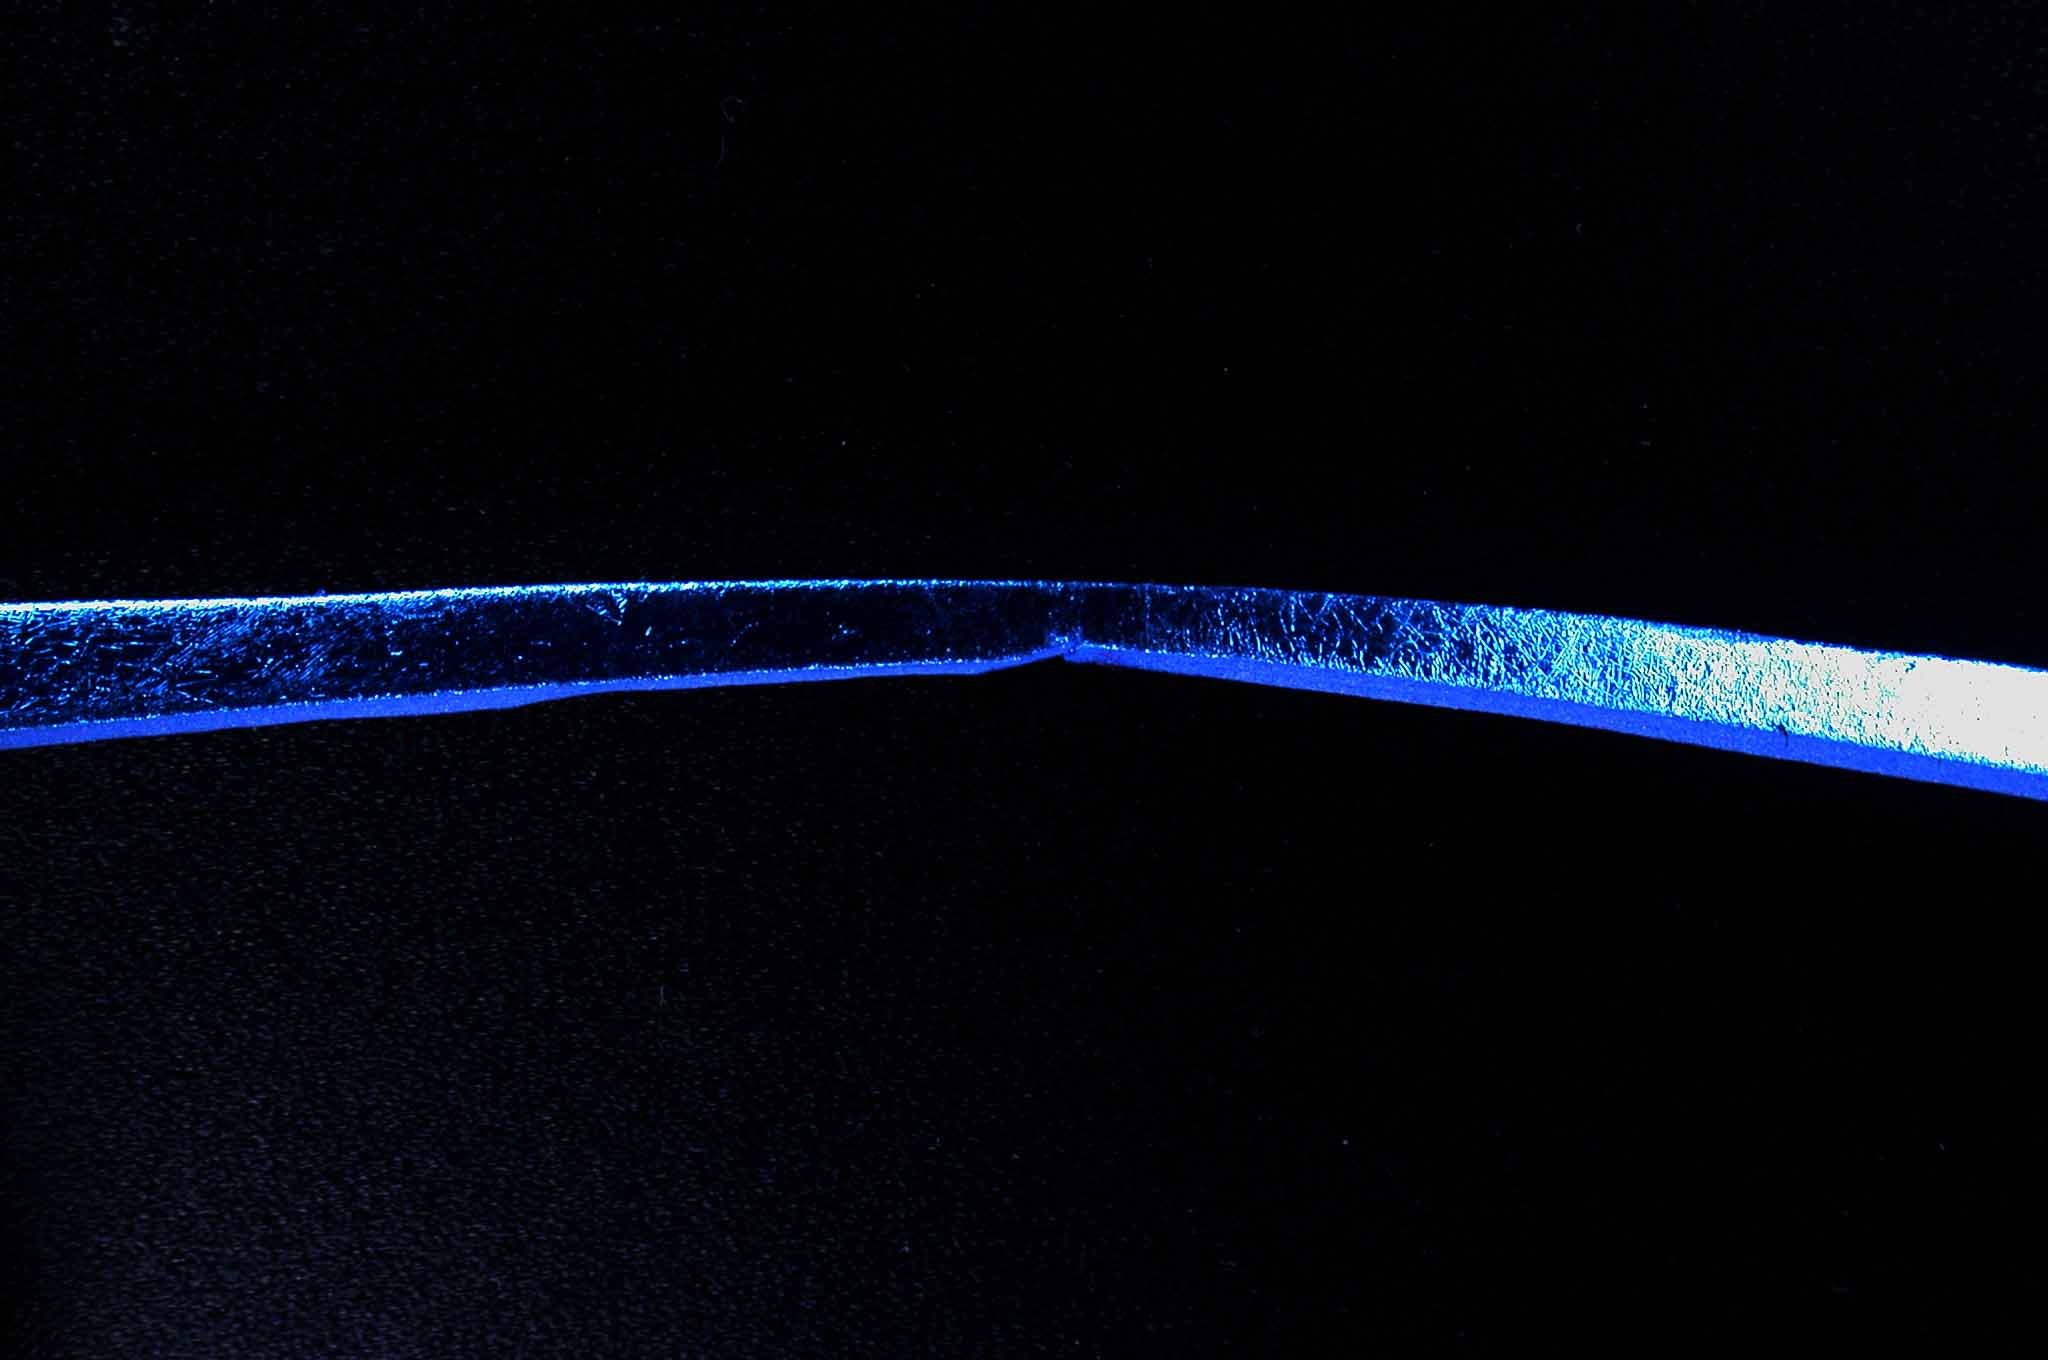
Cut a piece of loco foam in an elongated hourglass shape as shown. You will be folding this piece over to form the extended body on the bug, so you want the strip to be skinniest in the middle.
Step 2
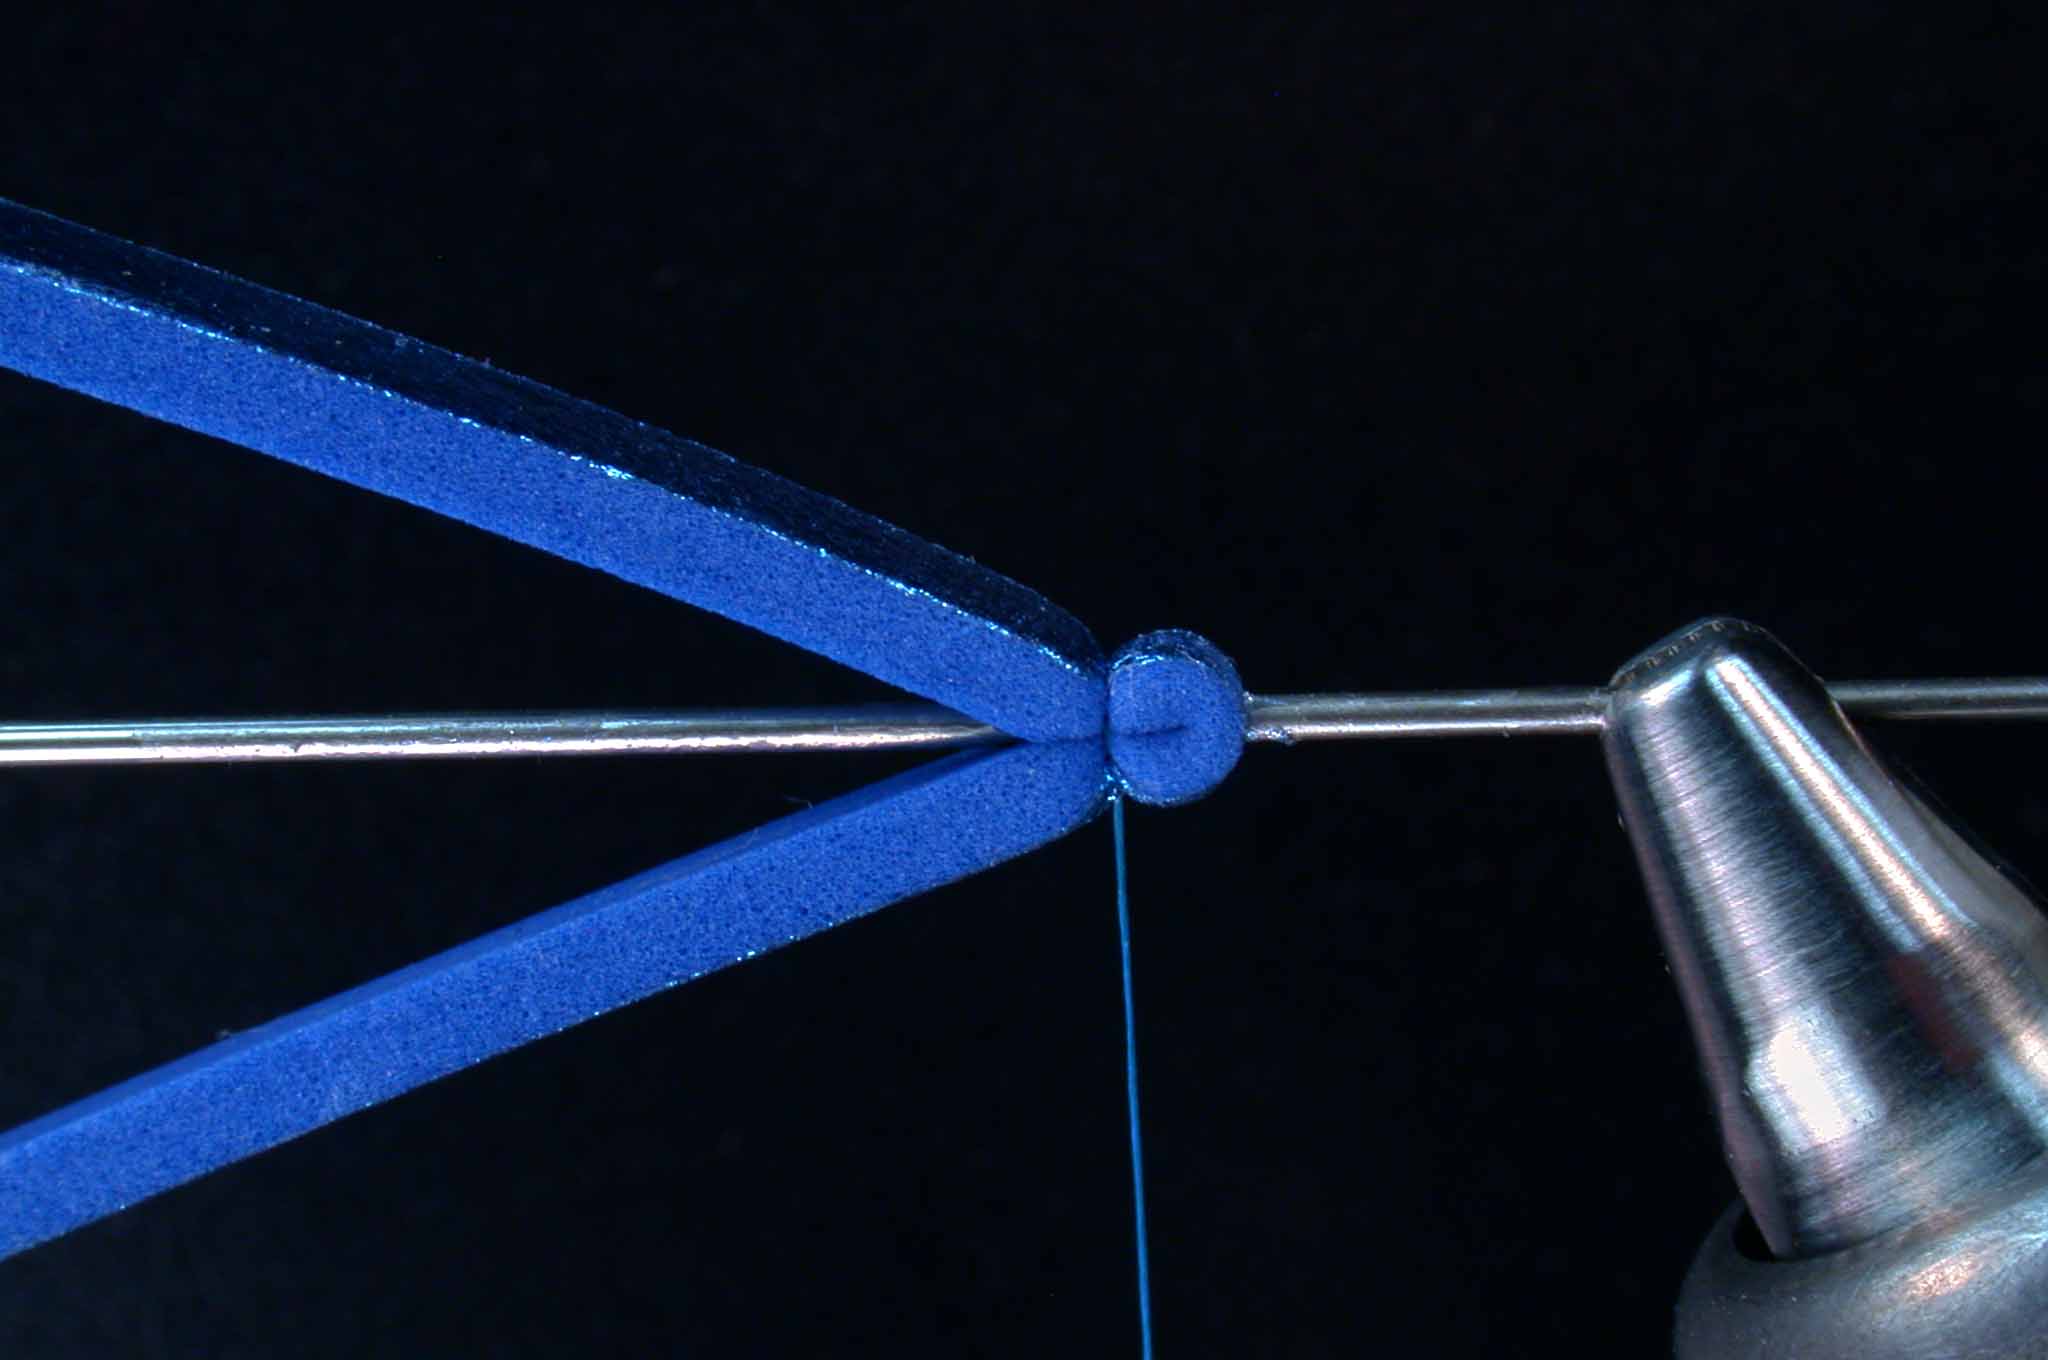
Place a large hat pin or sewing needle in the jaws of your vise.

Step 3
Poke the needle through the foam with the metallic side toward the vise/eye of the needle. slide the foam back to near the jaws of the vise.

Step 4
Start the tying thread with just a few turns immediately in front of the foam.

Step 5
Fold both the top and the bottom of the foam down onto the needle and make a few tight turns of thread to form the first segment.
Step 6
Pull both ends of the foam back and advance the thread forward on the needle with wide spiraling tuns. Move the thread just far enough forward for the next segment.

Step 7
Make the second segment as you did the first with several tight turns of thread.

Step 8
Continue the above process creating several segments along the foam. I try to make the segments slightly bigger toward the front end of the body as I go. Whip finish the thread at the last segment, but do not cut it just yet.

Step 9
Top view of the extended foam body. Pretty slick, eh?

Step 10
Pull the foam body off the needle with steady even pressure. Clip the thread off flush at this point. Once the body is off the needle, it is easier to get a close cut on the thread.

Step 11
Now you should have something that looks a little like this…

Step 12
Place a hook in the vise and start the thread behind the hook eye. Wrap a thread base to the bend and then bring the thread back to the center of the shank.

Step 13
Tie in a sparse clump of white Super Hair. You need about twenty or so strands, anymore and the fly will spin like a mutha when you cast it. Tie these strands in like spinner wings, with a few diagonal wraps to start…

Step 14
Make a few more diagonal wraps going the opposite direction of the first ones. You are essentially making X-wraps around the wings to forma set of spinner wings.

Step 15
Do your wings look like this? They should.

Step 16
Make a few post wraps around the far wing to group the fibers together as shown.

Step 17
Post around the base of the near wing as well. Make a final anchor wrap around the hook shank to lock everything down.

Step 18
Move the thread forward to about three eye lengths back from the hook eye.

Step 19
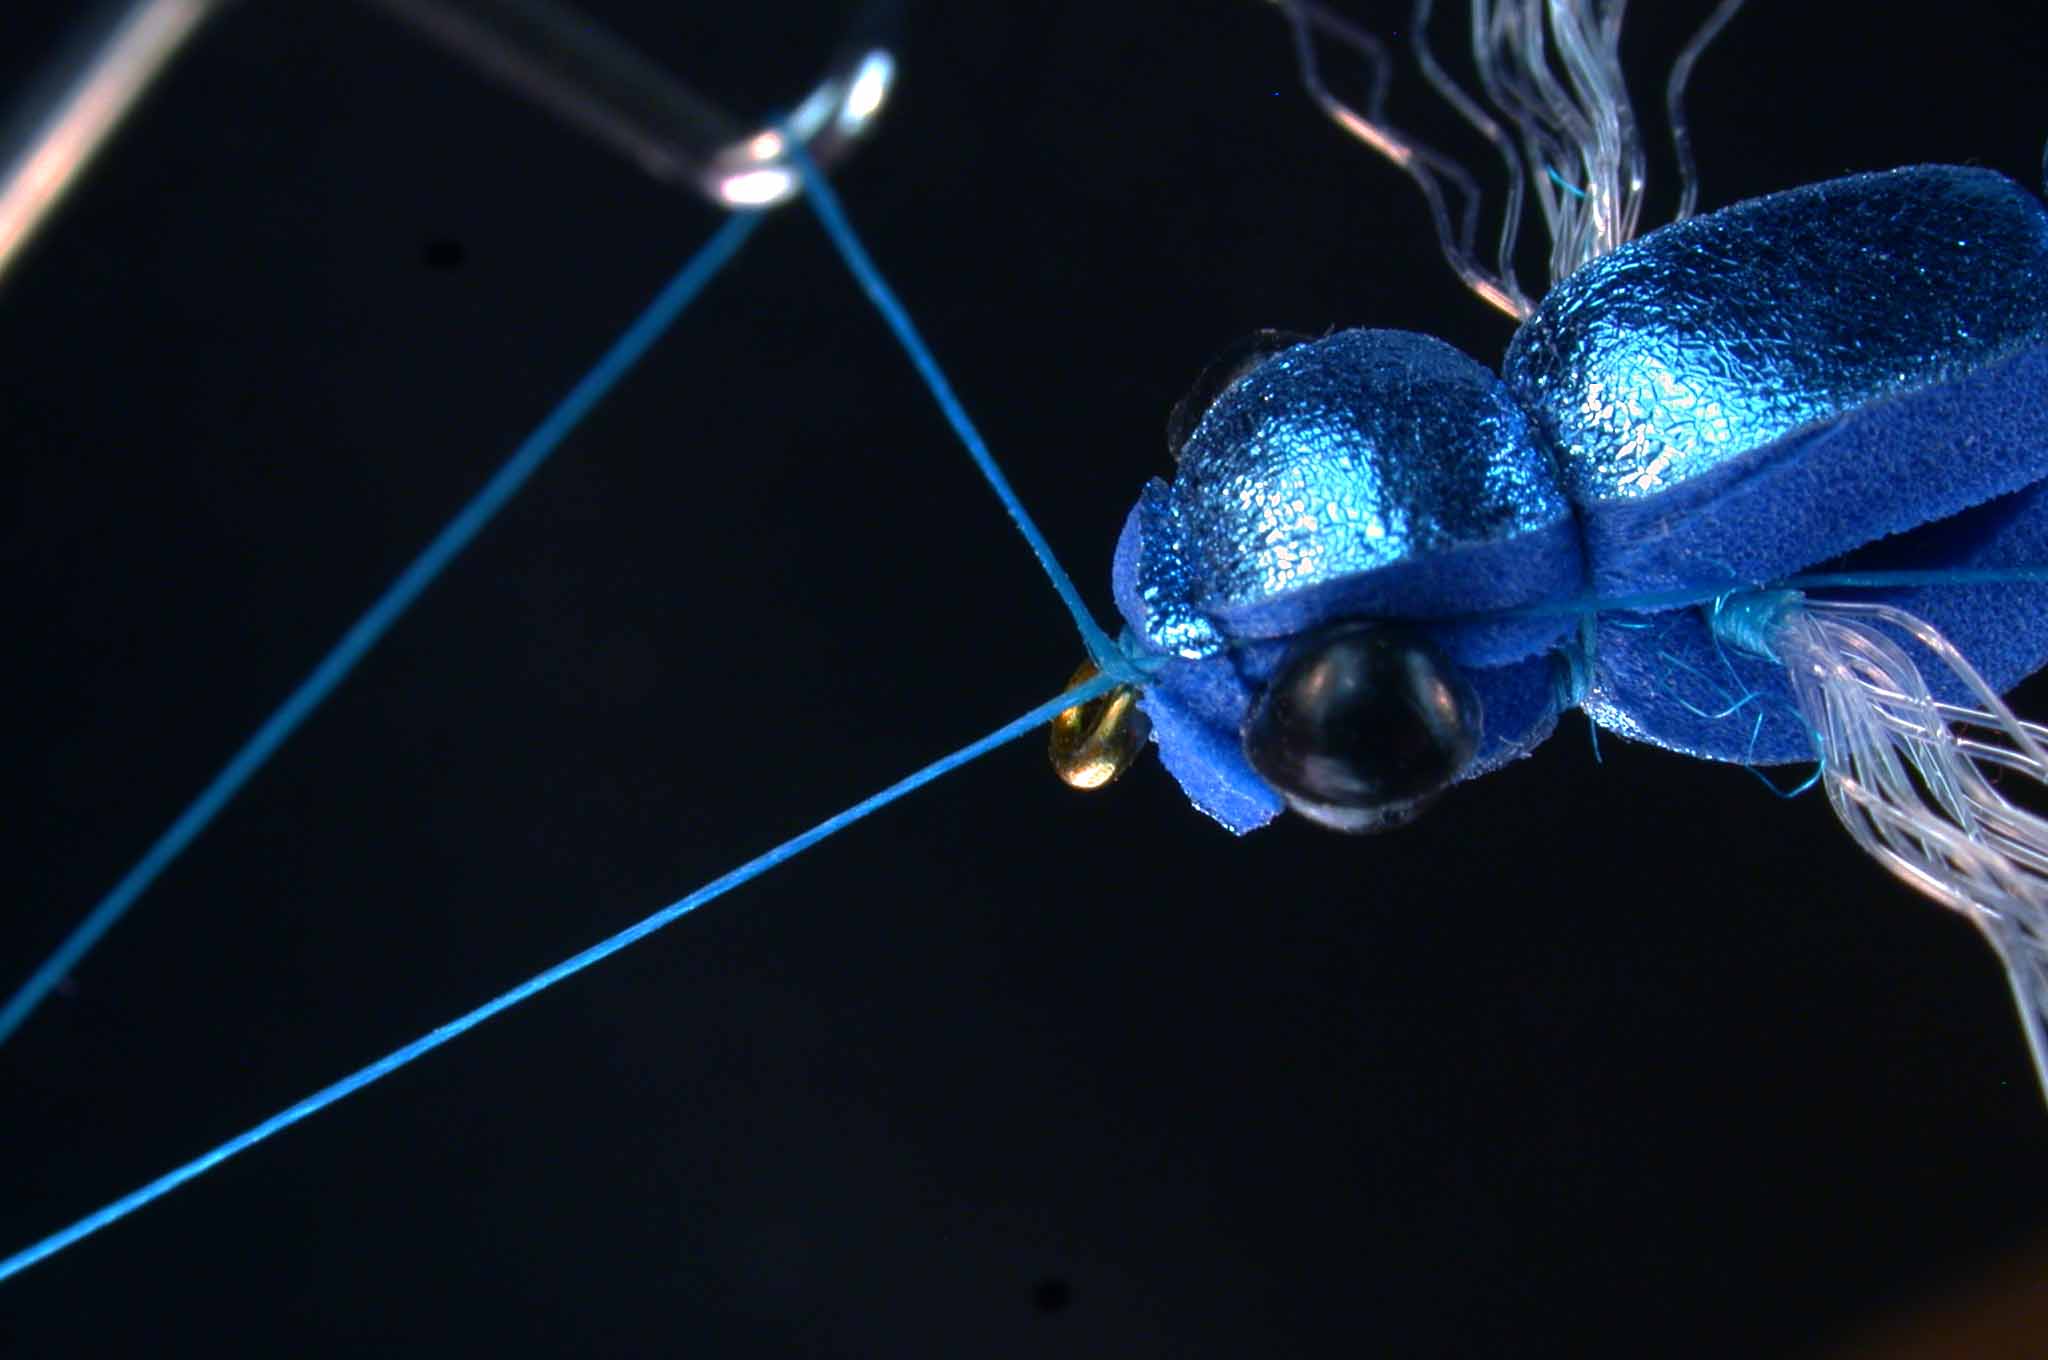
Tie in a pair of Mono Eyes just like you did for the wings…with x-wraps. Posting the eyes is not necessary.

Step 20
Dub the thread with some blue dubbing…not too much and not too little.. Wrap the dubbing around the shank, figure eighting around the eyes and the base of the wings, woring your way from the front of the hook to the bend.

Step 21
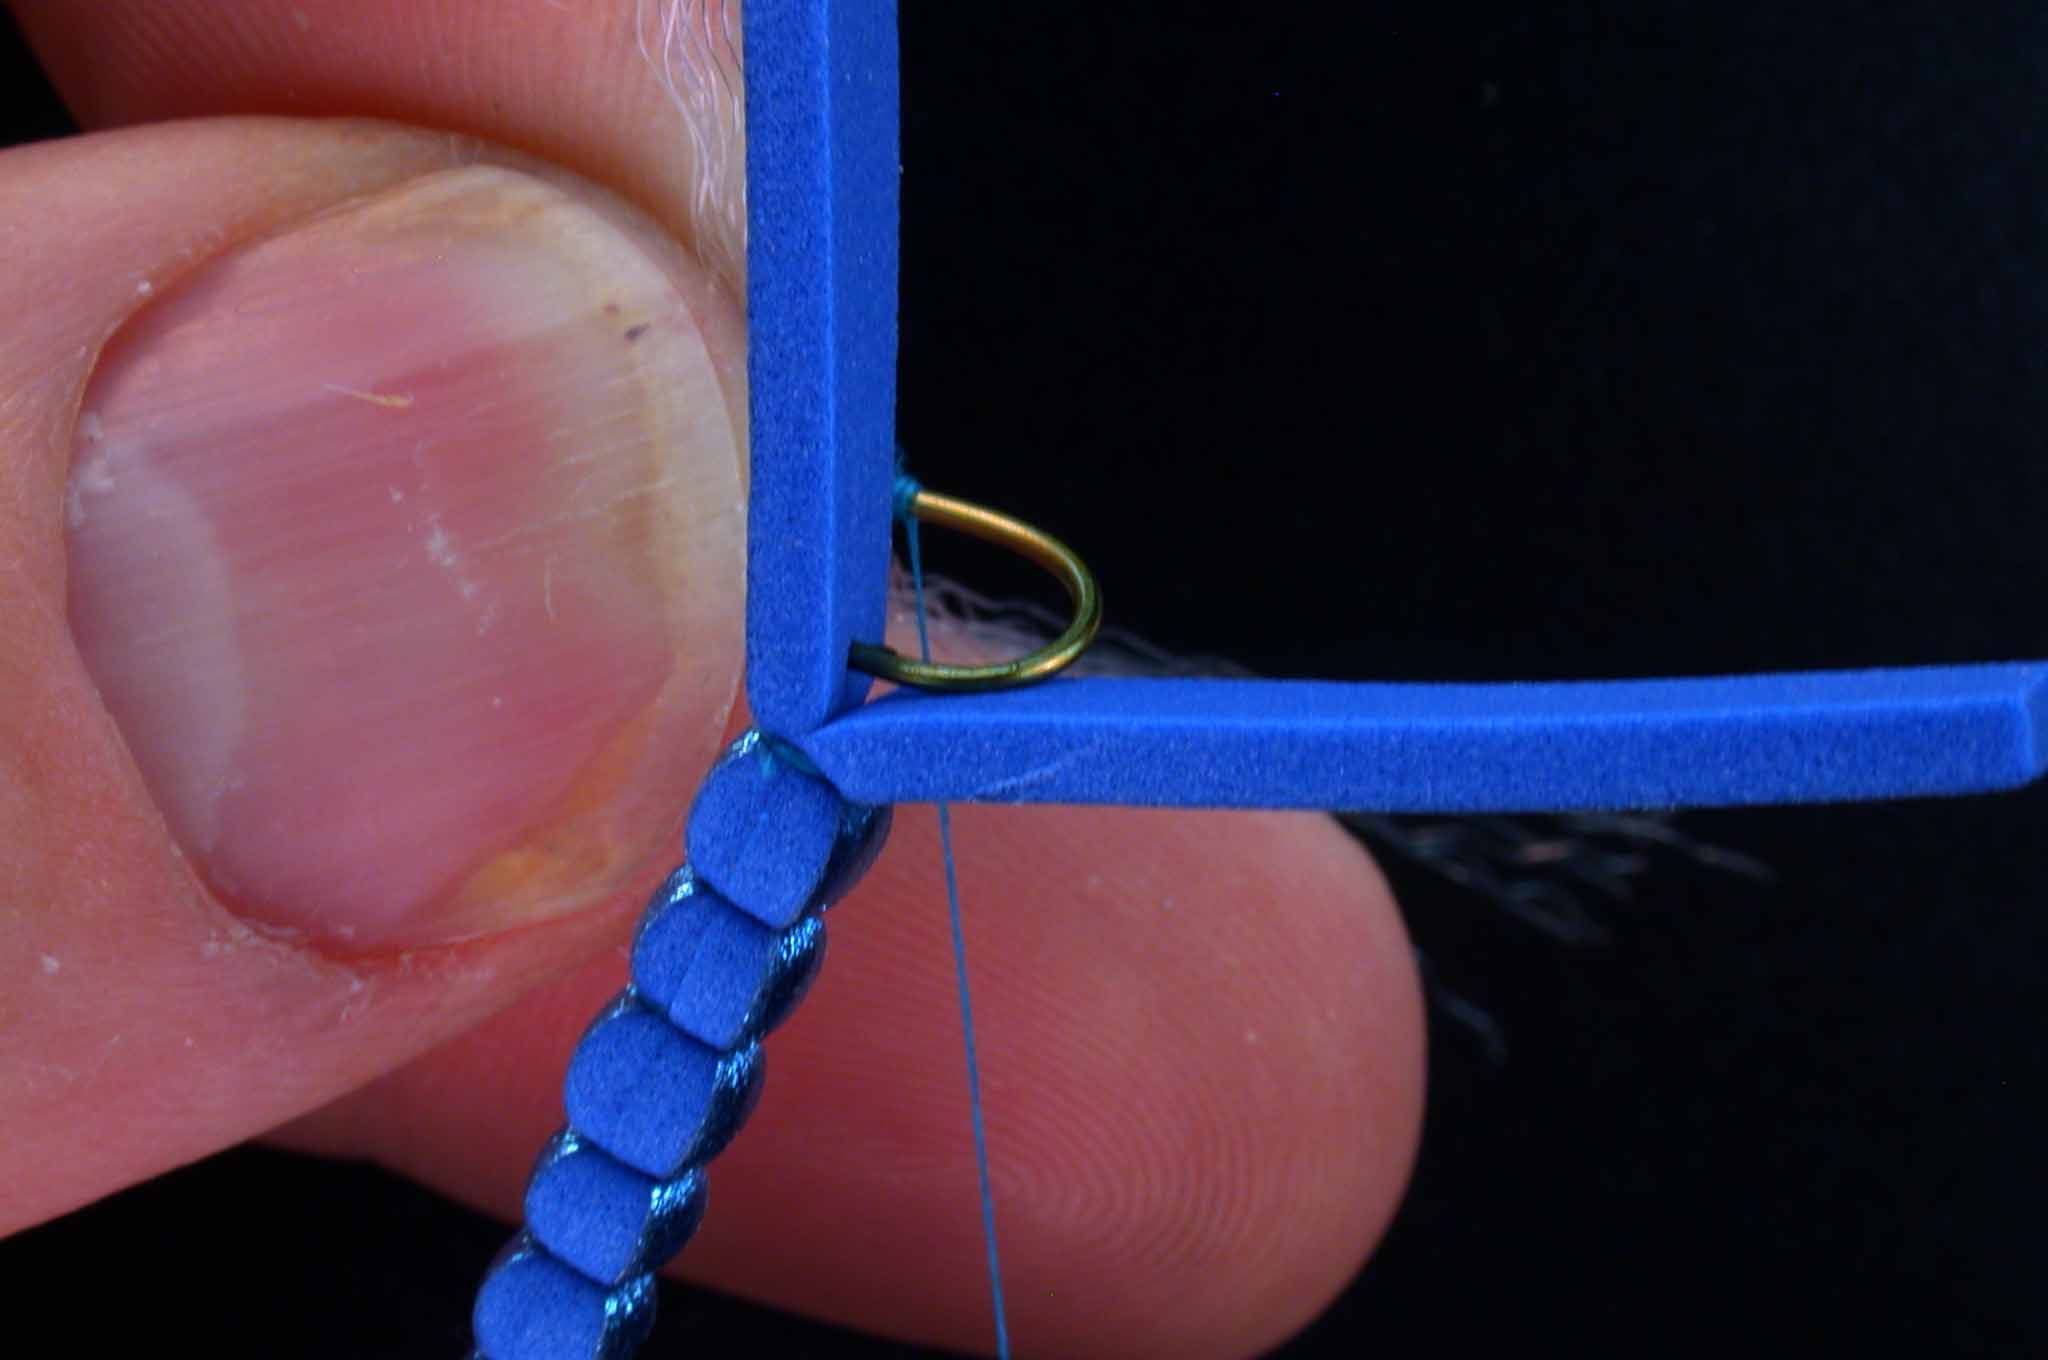
Push the hook point through the foam extended body near the base of the last segment.
Step 22
Push the foam up the hook so it butts against the dubbing, with one strip on top of the shank and one on the bottom.

Step 23
Jump the thread over the top of the dubbing so it is in front of the wings. Pull the top strip of foam tightly forward over the top of the dubbing.

Step 24
Pull the bottom piece of foam tight along the underside of the hook shank. Make a couple tight wraps over the foam, pinning it to the bottom of the fly.

Step 25
Pull the top strip tight again and tie it down in the same place a the bottom piece.

Step 26
Yours looks about like this now, right?

Step 27
Pull the top piece of foam back again and advance the thread forward to the front of the eyes.

Step 28
Bind the bottom piece of foam to the shank right behind the hook eye on the bottom of the hook.

Step 29
Bind the top piece of foam down as you did with the bottom piece.

Step 30
Clip the remaining foam flush against the hook shank, leaving short nubs like this.

Step 31
Whip finish right behind the hook eye and clip the thread.
Step 32
Trim the wings so they are about the same length as the body.

Step 33
Green version
