The Hornberg comes from the mid-west originally, but has been a favorite pattern of many old timers in Colorado and Wyoming. The very first commercial order of flies I ever tied was a batch of Hornbergs and I have hated them ever since;-) The “Hornberger” as my kid likes to call this fly, uses a matched pair of yellow hackle tips as an “inner-wing”, with a matched pair of mallard flank feathers on the outside. I tie the fly here with a soft grizzly hen hackle collar, but this fly can and is fished as a dry with a dry fly quality feather collar. The most common method of fishing this fly, aside from behind a clear bubble on a spinning rod, is to cast it out dry and let it drift, once it gets to the end of the drift, let it swing under the water and let it swing through the arc at the end of the cast. Finish up the cast by stripping the fly back to you like a streamer…you can’t say this fly doesn’t cover all the bases! Of course, you can tie this fly on a variety of different hook styles, as well as using either the soft hen feathers for the collar or the stiffer rooster neck feathers, it’s all up to you.
Materials Needed:
Hook: TMC 5262 #2-14
Thread: Black 70 denier
Body: Mini-Flat braid, gold, or flat mylar tinsel
Inner-Wing: Yellow Hackle tips from a Chinese Neck
Outer-Wing: Matched Mallard Flank Feathers
Eyes: Jungle Cock Nails or starling feathers
Hackle: Grizzly Hen Neck Feathers
Step 1
Start the thread about three eye lengths back from the hook eye and wrap a thread base back to the bend. Return the thread to the front of the hook where you started the thread.

Step 2
Tie in a length of Mini-Flat Braid at the front end of the hook with just a couple firm wraps of thread.

Step 3
Wrap the tinsel back toward the bend of the hook, forming a smooth even layer as you go.

Step 4
Once you reach the bend of the hook with the braid, start wrapping it back forward again to the starting point. This method makes for a very smooth two layer body.

Step 5
Wrap the braid all the way back up to the starting point and tie it off with a couple tight turns of thread.

Step 6
Clip the excess braid and then make a thread base up to the hook eye and back again to the front of the tinsel body.

Step 7
Pair up the tips of two yellow Chinese neck hackle feathers. Even their tips and measure them to one and a half times the shank length. Cut the butt ends of the feathers even then strip a few fibers from each feather to expose the bare stems.

Step 8
Lay the two yellow feathers with their insides facing each other so they cup together. Make sure the tips of the feathers remain even.

Step 9
Lay the bare stems of the two yellow feathers on top of the shank in front of the tinsel body. Try to get the stems of the feathers to lay side by side. Make a turn or two of thread over the stems, taking care to keep the feathers anchored to the top of the hook shank. Lift the long ends of the feathers up a bit with your material hand and wrap back over the stems to the front of the tinsel body. Lifting the feathers will hep keep them centered on the shank as you bind them in place.

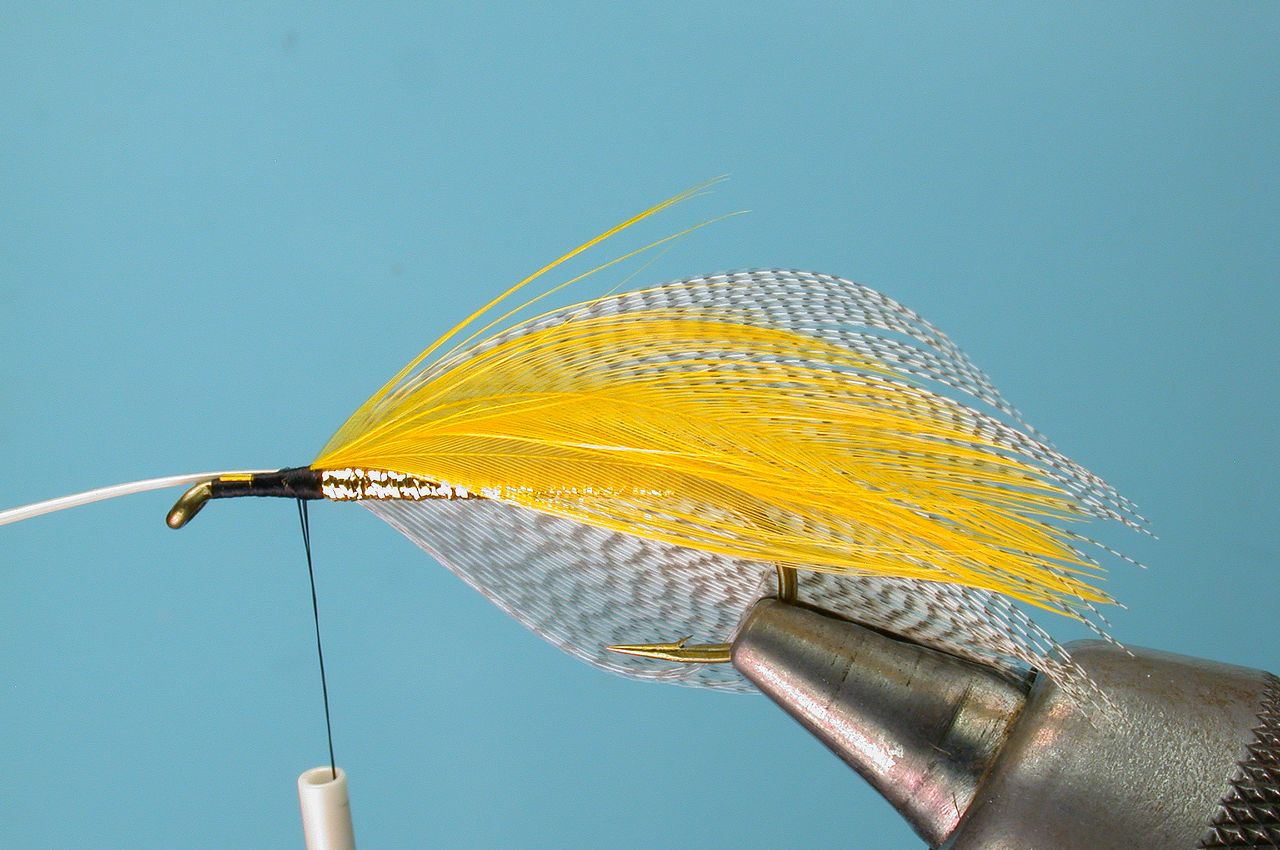
Step 10
The yellow feathers should extend past the bend of the hook about a half shank length and be centered on the top of the hook.

Step 11
Select two matched mallard flank feathers that are about half again longer than the shank.

Step 12
Strip the bases of both feathers, eliminating the fluff. Make sure the feathers are long enough (1 1/2 shank lengths). Lay one feather in on the far side of the hook by pressing your finger against it, pressing it to the far side of the hook shank. The bare stem should be up along the shank at the front of the hook and the tips of the feathers should be half a shank back from the bend. Hold the feather in place and tie it to the far side of the hook shank with several tight turns of thread.

Step 13
The center stem of the feather should be in lie with the hook shank on the far side as shown here.
Step 14
Lay the other mallard flank feather in along the near side of the hook and press it into place.

Step 15
Make a couple wraps of thread over the stem of the feather to secure it against the feather on the far side. You’ll see that the cupped nature of these feathers will even each other out when you tie them both in.

Step 16
Clip the stems of the feathers flush to the shank. Put a couple drops of head cement (flexible Vinyl Cement or the like) on the mid-point of each wing (both sides of the hook). Use your fingers to preen the tips of the feathers to a point and then wait a bit while the glue dries so it’s not tacky. Go feed the dog, have a smoke, read a book…whatever, it should only take a minute or so.

Step 17
Peel the fluff from the base of a jungle cock eye and place it along the near side of the hook, parallel to the wing. Tie the feather in place with a few tight turns of thread.

Step 18
Tie another jungle cock feather in along the far side of the hook so it matches the length of the first one, which, incidentally, should be about half the wing length. Clip the stub ends of the jungle cock feathers flush.

Step 19
The fly ought to look a little something like this now…does it?

Step 20
Select two hen neck feathers that have fibers equal to about a half a shank length. Preen the fibers back from the tips of the two feathers. we are going to tie both feathers in at the same time as one unit, so make sure the feathers are facing inside to outside.

Step 21
Tie the tips of the feathers to the shank with the outside of the top feather facing up or out. we want to wrap a wet fly style collar and sweep the fibers back along the shank here, so the feathers face must be toward the front when we start to wrap.

Step 22
Pull the feathers up above the shank and strip a few fibers from their stems up near the base. We want to tie the feathers off to the shank on this bare stem section to eliminate bulk, so plan a bit ahead here and do this now.

Step 23
Fold the hackle fibers back along their stem so they all face back toward the bend. Make sure to get a nice clean fold.

Step 24
Wrap both feathers forward one turn in front of the last, forming a soft breathable collar. Tie the feathers off at the bare stem section at the eye of the hook.

Step 25
Whip finish and clip the thread. Add a drop of head cement or Sally Hansen’s Hard As Nails, for shiny head.
