The PMX is a variation on the old Madame X, popularized by Doug Swisher. With the addition of a parachute post, this fly becomes both more visible and lower floating than the original, but every bit as effective. The PMX is a great dry/dropper fly to hang a bead head or two off of, as well as a reasonably good stonefly adult imitation. There are a few tricks in tying this complicated fly, but none of the steps are particularly hard to do, it’s just that there are so dang many of them! Twist a few of these up and tie one on the next time you encounter fish on the lookout for attractor bugs.
Materials Needed:
Hook: TMC 5212 #6-16
Thread: 70 Denier Florescent Green
Tail: Natural Cow Elk Hair
Body: Olive UNI-Stretch Floss
Wing: Natural Cow Elk Body
Legs: Medium Round Yellow Rubber Legs, Barred with a black marker
Parachute Post: White McFlylon
Hackle: Brown and Grizzly Rooster Saddle or Neck
Thorax: Peacock Herl
Step 1
Start the thread at the eighty percent point on the shank and wrap a base back to the bend of the hook. Build a small nub of thread at the bend of the hook with the tying thread. This nub should start even with the back edge of the point on the BARB and extend back, just slightly down the bend of the hook. The nub should be about double the diameter of the hook shank at its widest point.

Step 2
Cut, clean and stack a small clump of elk hair. Measure the elk against the GAP of the hook, so it is equal in length to the distance from the point on the hook to the shank. Tie the elk in at the bend of the hook in front of the thread nub with several tight wraps of thread. Make a narrow band of thread that travels forward toward the hook eye to compress the hair tightly.

Step 3
Gather the butt ends of the elk so they surround the shank and spiral wrap the thread forward over these butts to the seventy percent point on the shank. Cinch the thread down tight at the front of the hair underbody. This step will create a hair underbody that will give both some bulk to the body and a bit of added flotation.

Step 4
Clip the remaining butt ends of the elk off flush against the shank and wrap the thread back and forth over the hair underbody to smooth it a bit.

Step 5
Wrap the tying thread all the way back to the bend and begin making tight, concentric wraps at the bend just in front of the tail. Work these wraps back over the elk hair tail to push the hair up against the thread nub we built earlier. This step will flare the hair out over the nub, creating a wide tail that will better support the bend of the hook.

Step 6
Detail of the splayed tail.

Step 7
Return the thread to the front of the elk underbody. Spool up a bobbin with the UNI-Stretch Floss (make sure it is a smooth tipped bobbin, not one with a flared tip) and leave a short tag of floss hanging from the end of the bobbin tube. Tie the bobbin tube to the hook with a single turn of the tying thread at the front end of the body. Withdraw the tube from the floss bobbin and the tying thread will catch the end of the floss against the shank. This method eliminates any waste of floss and the need to handle the floss with your fingers. This floss is prone to fraying when handled, so this is an easy trick to get around that problem. Using the bobbin also helps with wrapping the floss as you can spin or counter-spin the bobbin to flatten the floss as you wrap later.

Step 8
Wrap the tying thread back over the floss to the bend of the hook, then return the tying thread to the front of the underbody. Whip finish and clip the tying thread here.

Step 9
Wrap the floss forward from the bend creating a smooth, single layer body up to the end of the underbody.

Step 10
Wrap a second layer of floss from the front of the underbody back to the bend. Be sure to occasionally unwind the floss by spinning the bobbin to keep the floss flat as you wrap.

Step 11
Return the floss to the front of the underbody with a third layer. This last layer is the most important as far as keeping the floss flat and smooth, so take the necessary steps to make it look nice. Whip finish the floss, as you would the thread, at the front of the body and clip the excess.

Step 12
Re-attach the tying thread at the front of the body and clip the tag end.

Step 13
Cut, clean and stack a larger clump of the same elk hair and measure it against the hook so it is equal in length to the distance from the front of the underbody to just about the base of the tail. Anywhere between the base of the tail and the end of the tail is acceptable, but I tend to shorten the wing up a bit for a more realistic profile.

Step 14
Tie the elk hair in at the front of the body with several turns of thread, tightening them as the thread comes toward you under the hook. This will keep the hair from wanting to spin around the hook. You won’t be able to compress the whole clump at once with this thread, so don’t get worked up about it right now. Just compress the hair as tightly as you can. If you break your thread, re-attach it and don’t pull so dang hard next time!

Step 15
Here is where we’ll really get the hair anchored. Wrap the tying thread forward through the butt ends of the hair in small incremental wraps. These turns of thread should flare a few hairs with each turn, thereby binding each hair down individually as you wrap. Work the thread forward through all the butts up to about two eye lengths back from the hook eye.

Step 16
Clip the butt ends of the wing at an angle to provide a nice, smooth slope to the head area, rather than a blocky “step”. Wrap the tying thread over the stub ends of the wing to smooth out the base.

Step 17
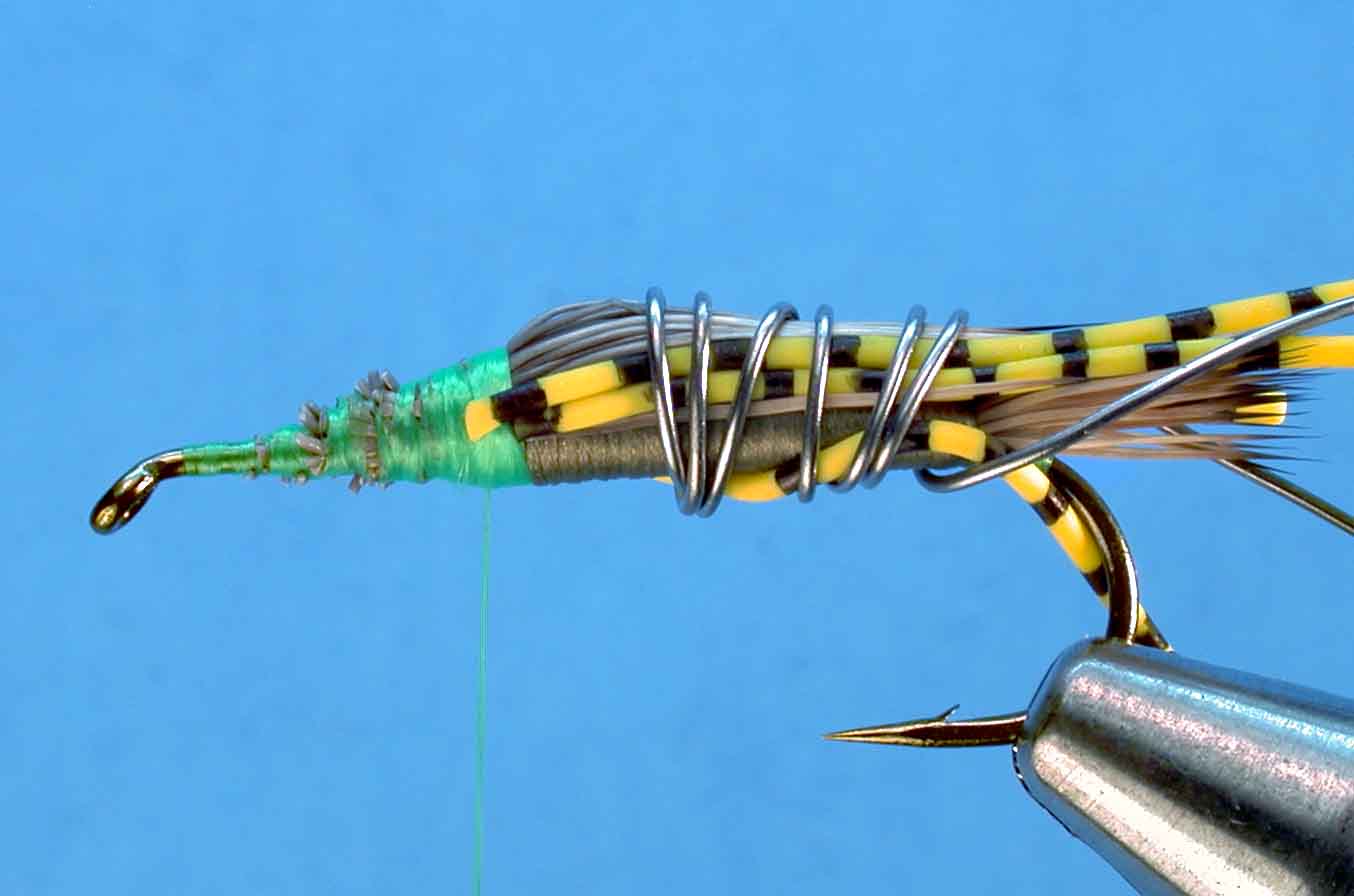
Tie in a single strand of rubber leg along the near side of the hook at the base of the wing. Make a narrow band of thread at the center of the leg in the tie down area to splay the legs out to the front and rear.

Step 18
Repeat the above process on the far side of the hook to connect another leg. Don’t worry about the length of the legs for right now, we’ll cut them to length later.

Step 19
Wrap a piece of lead wire around the legs and wing, holding them all back along the body and out of the way during the rest of the fly.
Step 20
Move the thread forward to the seventy-five percent point on the shank, or the middle of what is left of the hook if you jammed up your proportions a bit (you did, didn’t you?). Tie in a heavy clump of white McFlyFoam at the center of its length with a couple TIGHT turns of thread.

Step 21
Pull the McFlylon so it is perpendicular to the hook shank and make a couple more wraps in the opposite direction of the first two. Continue X-wrapping to secure the wings to the shank. Be sure these wraps are tight as they will determine how easy it is to wrap the parachute post to come later. Snug those wrap down tightly and get on with it!

Step 22
Pull the two “wings” up and together above the shank into a single unit. Post the tying thread around the base of the wing with several tight wraps. The post doesn’t need to be real tall just yet, just enough to gather the wing into a single clump and secure everything in place.

Step 23
Select, size and prepare one brown and one grizzly hackle feather. Stack the feathers inside to outside and it doesn’t matter which one is on top. Peel the fibers from the base of both feathers exposing the quill for a distance of about half a shank length. Tie the feathers in with the outside of the feathers facing UP at the back edge of the hook eye and wrap back over the stripped stems to the base of the parachute wing.
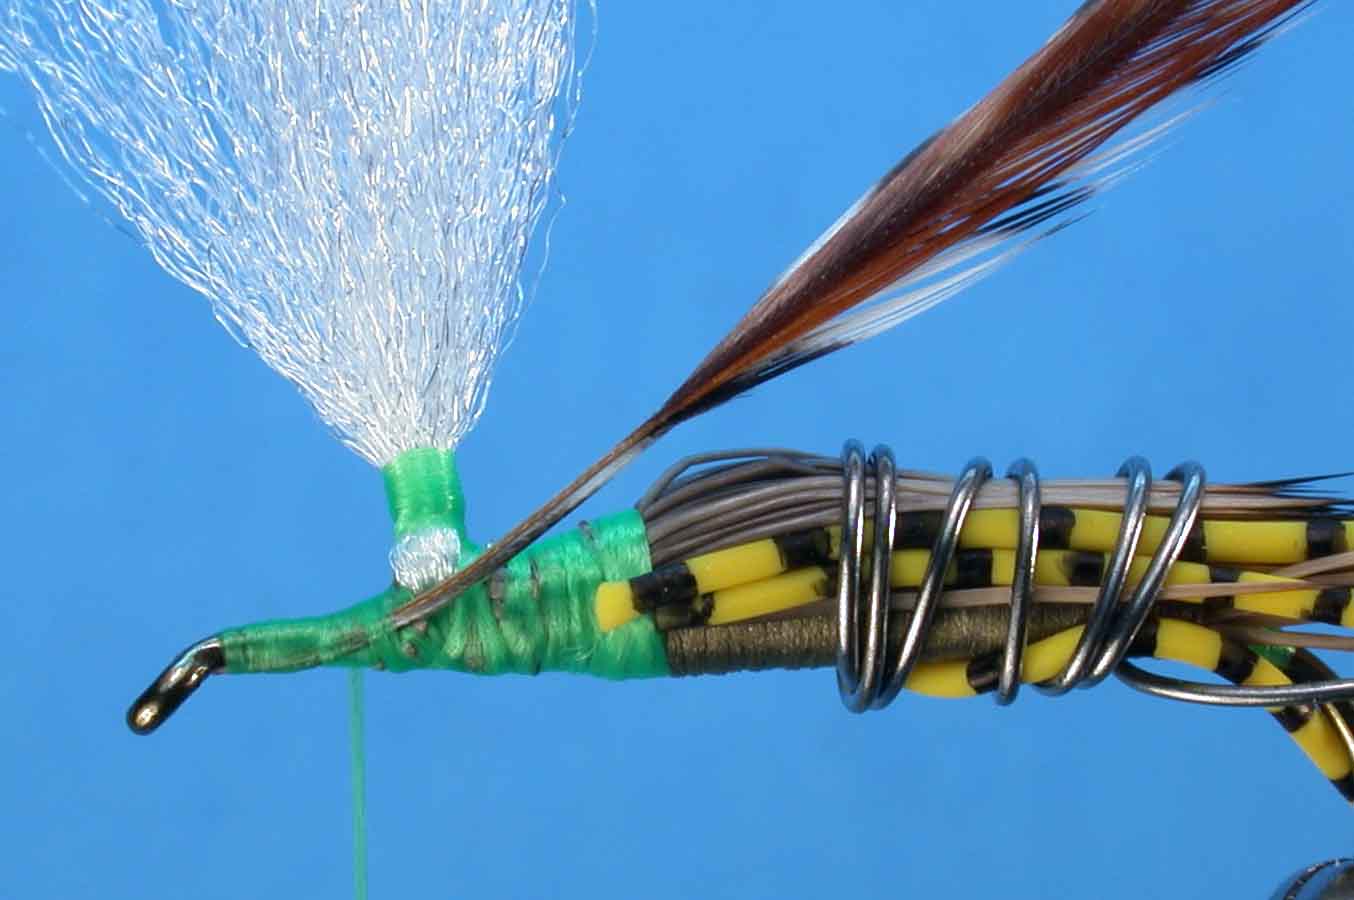
Step 24
Pull the feathers up so they are parallel to the parachute post and tie the stripped quill section to the wing base by posting the thread around the base of the wing AND the feather stems to the top of the post. It is a good idea to wrap a bit further up the post here, as the thorax on this pattern is relatively thick and if you leave the post short, there will be no base to wrap the hackle around later. Consider yourselves warned…

Step 25
Wrap the thread back down to the base of the post and take a security wrap around the shank to keep everything from coming unwound.

Step 26
Detail of the thread post and hackle tie in. Note that there is a bit of bare feather stem above the last wraps of thread on the parachute post. This bare stem will allow the hackle to “set” in a perpendicular position in relation to the post on the first turn. Had I wrapped all the way up to the hackle fibers, the first turn would produce some hackle fibers that stick straight up parallel to the wing and look like caca. No one likes caca.

Step 27
Tie in three or four peacock herls by their tip ends at the base of the parachute post and wrap back over them to the base of the elk hair wing. Add a drop of head cement at this point to the thread base and post to lock everything down. There is a lot going on right here and we want to make sure it all stays where it’s supposed to.

Step 28
Release the front legs from the lead wire by catching them with the tips of your scissors and pulling them forward. Make a wrap of peacock in front of the base of the legs then travel backwards…

Step 29
…and make the next wrap of peacock in the space between the front and back legs. Continue wrapping the peacock forward to the base of the wing post.

Step 30
Wrap the peacock in front of the post as well, and even criss-cross it back and forth around the base of the wing to fill out the thorax. It may help to twist and roll the peacock herls together in your fingers a bit to group them into a single clump as you go. Tie the peacock off at the back edge of the hook eye with several tight turns of thread. Clip the excess peacock herl flush.

Step 31
The thorax ought to look a little something like this.

Step 32
Wrap the two hackles (clockwise for lefties and counter-clockwise for those of you who tie backwards;-) together from the top of the post down, with each succeeding turn UNDER the previous turn to the top of the peacock thorax. You can pack a fair amount of hackle in here, so don’t be shy with it.

Step 33
Grasp the wrapped portion of the hackle in your index finger and thumb and pull it back and out of the way. Pull the tips of the hackle feathers out so they point out over the hook eye as shown. Execute a pinch wrap (you like the use of “execute” there, don’t you…LOL!) to tie down the hackle tips. Follow up with several more tight turns to really anchor the tips down.

Step 34
Come in from the front of the fly with the tips of your scissors and clip the excess hackle tips off flush against the hook eye.

Step 35
Build a smooth thread head to cover any stubs and whip finish right behind the eye of the hook. Clip the thread.

Step 36
Trim the parachute post straight across so it is about a half a shank length long. Remove the lead wire from the wing and legs. Cut the rubber legs so they are as long as the tail in back and about the same to the front, maybe just a touch shorter.

Step 37
Finished fly, top view. Note the angle of the legs and the splay of the elk hair wing and tail.
