This old timey pattern comes from eastern Tennesee and is a favorite pattern for many anglers in the south eastern U.S. The Tellico used to be a pretty common pattern even out here in the west, but for some reason it seems to have fallen out of favor. Fortunately for us, the fish have not forgotten about the Tellico. It’s a simple and fun pattern to tie and fish still find it appealing. Just for kicks, try varying some of the body floss colors for different effects. I’ve thrown my own variable into this one here with a coated shellback that will add both some weight and durability to the pattern. I’ll also show how to make the fragile peacock rib a bit more durable and a few tips on working with floss. See if you can’t find some new trick on this old fly.
Materials Needed:
Hook: TMC 3761 #10-18
Thread: White 70 Denier UTC and finished with Veevus 14/0 Black
Weight: Lead Wire
Tail: Originally natural guinea body feathers, but I subbed in well marked teal flank just because…
Shellback: Natural Mottled Turkey Wing Quill
Rib: Peacock herl twisted with fine copper wire
Abdomen: Bright Yellow Rayon Floss
Hackle: Brown Hen Neck
Coating: Solarez Thin Hard
Step 1
Wrap about ten to twelve turns of lead wire centered just forward of the center of the hook. Break the ends off the lead and tuck them in so they fit tight to the hook. Start the white 70 Denier thread in front of the lead wraps and build up a small thread dam tapering from the bare shank up to the lead. Cross the thread back over the lead wraps and build another thread dam tapering back down to the bare shank. Bring the thread all the way to the bend of the hook. Peel a clump of teal or guinea fibers from the stem, taking care to keep the tips even. Measure the clump against the shank so it is just slightly longer than a half shank length.

Step 2
Tie the teal/guinea in at the bend forming the tail. Secure the fibers at the bend with several tight turns, then wrap forward over the butt ends of the fibers to the front of the lead wraps. These butts will help to form the underbody of the fly.

Step 3
Clip the butt ends of the tail fibers flush and bring the thread back to near the end of the lead wire. Coat a section of turkey wing with vinyl cement and let dry. Cut a section of the turkey feather that is just a bit narrower than the hook gap. Cut the tip from the feather so it is square on the end.

Step 4
Tie the turkey slip in at about the center of the shank on top of the lead wraps with the inside of the feather facing up. The turkey feather slip should cup around the shank when you bind it down.

Step 5
Wrap back over the turkey slip to the bend of the hook, taking care to keep it buckled and centered as you go. Select about five peacock herls from the eye of the feather. Clip their tips square.

Step 6
Tie the peacock herl in and wrap back over it to the bend of the hook.

Step 7
Return the thread to the front of the lead wraps and tie in a six inch length of fine copper wire. Wrap back over the wire to the bend of the hook.

Step 8
Use the white thread to build a slightly tapered underbody shape as shown here. Try to keep the wraps as smooth as possible, taking the time to unwind the thread occasionally will go a long way towards a smooth underbody. Remember, the overbody will mirror the underbody so pay attention to this step. Whip finish the white thread at the front of the body and clip it. Start the black 14/0 thread at the front of the body and leave it hanging.

Step 9
Cut a 10 inch length of floss from the spool and split it in half. If you carefully untwist the center of the strand you’ll see the two strands separate. Slide your scissor tips between the two strands and divide them from thier center toward the ends. Tie in a half strand of floss at the front of the body with five, yes, EXACTLY five turns of thread.

Step 10
Bring the floss up and over the hook to the far side and pull it down. Stroke the floss strand between your fingers from the shank down to align the fibers and flatten the strand. Begin wrapping the flattened strand toward the bend of the hook from the front. Ultimately, we will make a two layer floss body and this is the first half of the first layer.

Step 11
Continue wrapping the floss back to the bend of the hook and then return it with smooth even wraps to the starting point. Unwrap three of the five turns that you used to tie the floss in then tie off the floss with three more turns at the front. You just unwrapped a couple turns that weren’t needed and replaced them with a couple turns that were. You can do this with all sorts of materials and in any case where you are trying to control bulk.

Step 12
Trim the tag ends of the floss flush and make a couple more turns over their ends to smooth them off. Use a smooth dubbing needle to burnish the body to smooth the floss out a bit. Run the side of the needle firmly against the body to take out any minor lumps and bumps. Look at the previous photo versus this one for the subtle, yet obvious results.

Step 13
Bring the peacock herls and the wire together on your near side of the hook. Wrap the wire around the herls about six or seven times.

Step 14
Grab both the wire and the herls in your fingertips and spin the two together, coiling the wire into the herl several times. Be careful not to overdo this, because it can be easy to break the peacock herls and when that happens you get to START OVER!

Step 15
Spiral wrap the peacock herl/wire brush forward with about four evenly spaced turns to the front of the body and tie it off. Clip the excess.

Step 16
Select a hen neck feather that has barbs equal to about a shank length. We are going to tie this feather in by its tip and we’ll only need a few turns so peel the excess fibers away from the butt end of the feather leaving only the bare stem.

Step 17
Preen the fibers back from the tip of the feather and tie it in by the tip just behind the index point. You want the inside of the feather to be facing the shank here.

Step 18
Wrap tightly over the tip of the feather to just behind the hook eye and trim the excess. Lift the butt end of the feather up and fold the fibers to the rear side of the stem as per a wet fly style collar.

Step 19
Wrap the hen feather one turn directly in front of the other for about three turns and tie it off on the bare stem at the back of the index point. Clip the excess stem flush. Sweeping the hackle fibers back after each turn will result in a nice flowing, swept back collar as shown here.
Step 20
Use your fingers to part the hackle collar on the top of the fly and pull the shellback forward over the top. Bring the thread up and over the front of the shellback at the back edge of the index pointusing your material hand to work the thread. Let the taut shellback support the thread to keep the shell centered on the top of the hook and pull straight down on the thread to tighten the wrap.
Step 21
The shell back should cup around the body of the fly as well as the hackle collar like this.
Step 22
Clip the excess turkey quill as closely as you can and build a short, neat thread head over the stubs. Whip finish the black thread. If your head is all big and bulky here, it’s because you ignored my advice about using the tiny, thin 14/0 thread. When will you learn??!!

Step 23
Use a short tipped bodkin to apply a thin coat of Solarez Thin Hard over the top of the shellback. Try to get an even layer over the entire shell, from front to back and side to side. Use the UV Light to cure the resin.

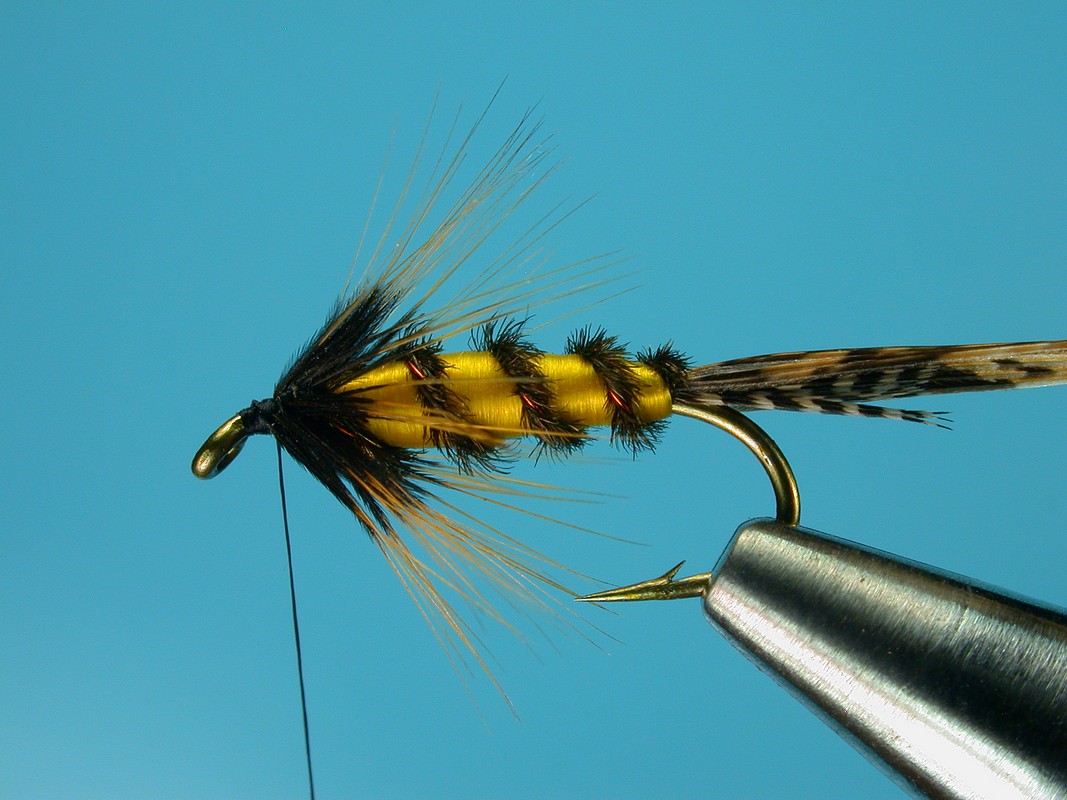
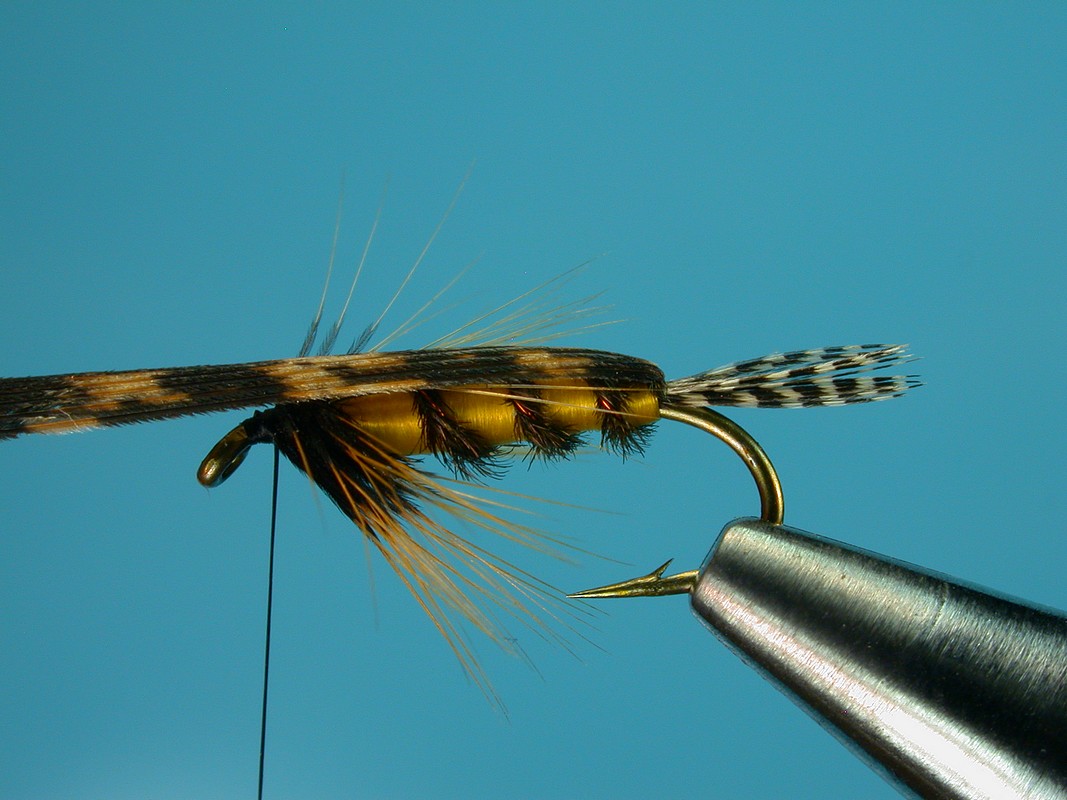
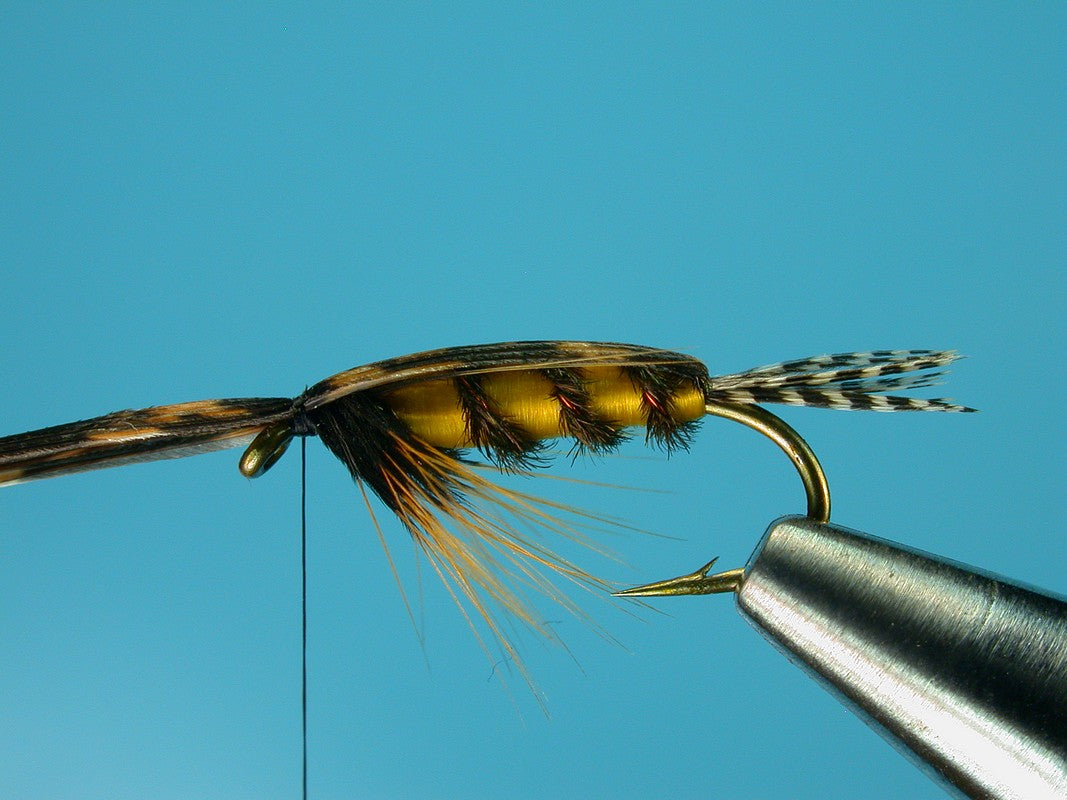
Step 24
Finished fly, bottom view.
