Here’s the fly you’ve all been waiting for! The Viz-A-Dun from John Barr. This pattern is a simple to tie, buoyant hatch matcher that is also easy to see. The Vizadun also incorporates a few little tying tricks that make the pattern quite durable. While not a far reach from the traditional thorax style patterns, the Vizadun is a new twist on an old fly. John likes this pattern as a front fly in a twoo fly combo rig, often dropping a Barr Emerger off the bend anywhere from six to eighteen inches back. The Vizadun is an unobtrusive indicator that allows feeding the fish the dropper without raising any eyebrows…do fish even have eyebrows?
Materials Needed:
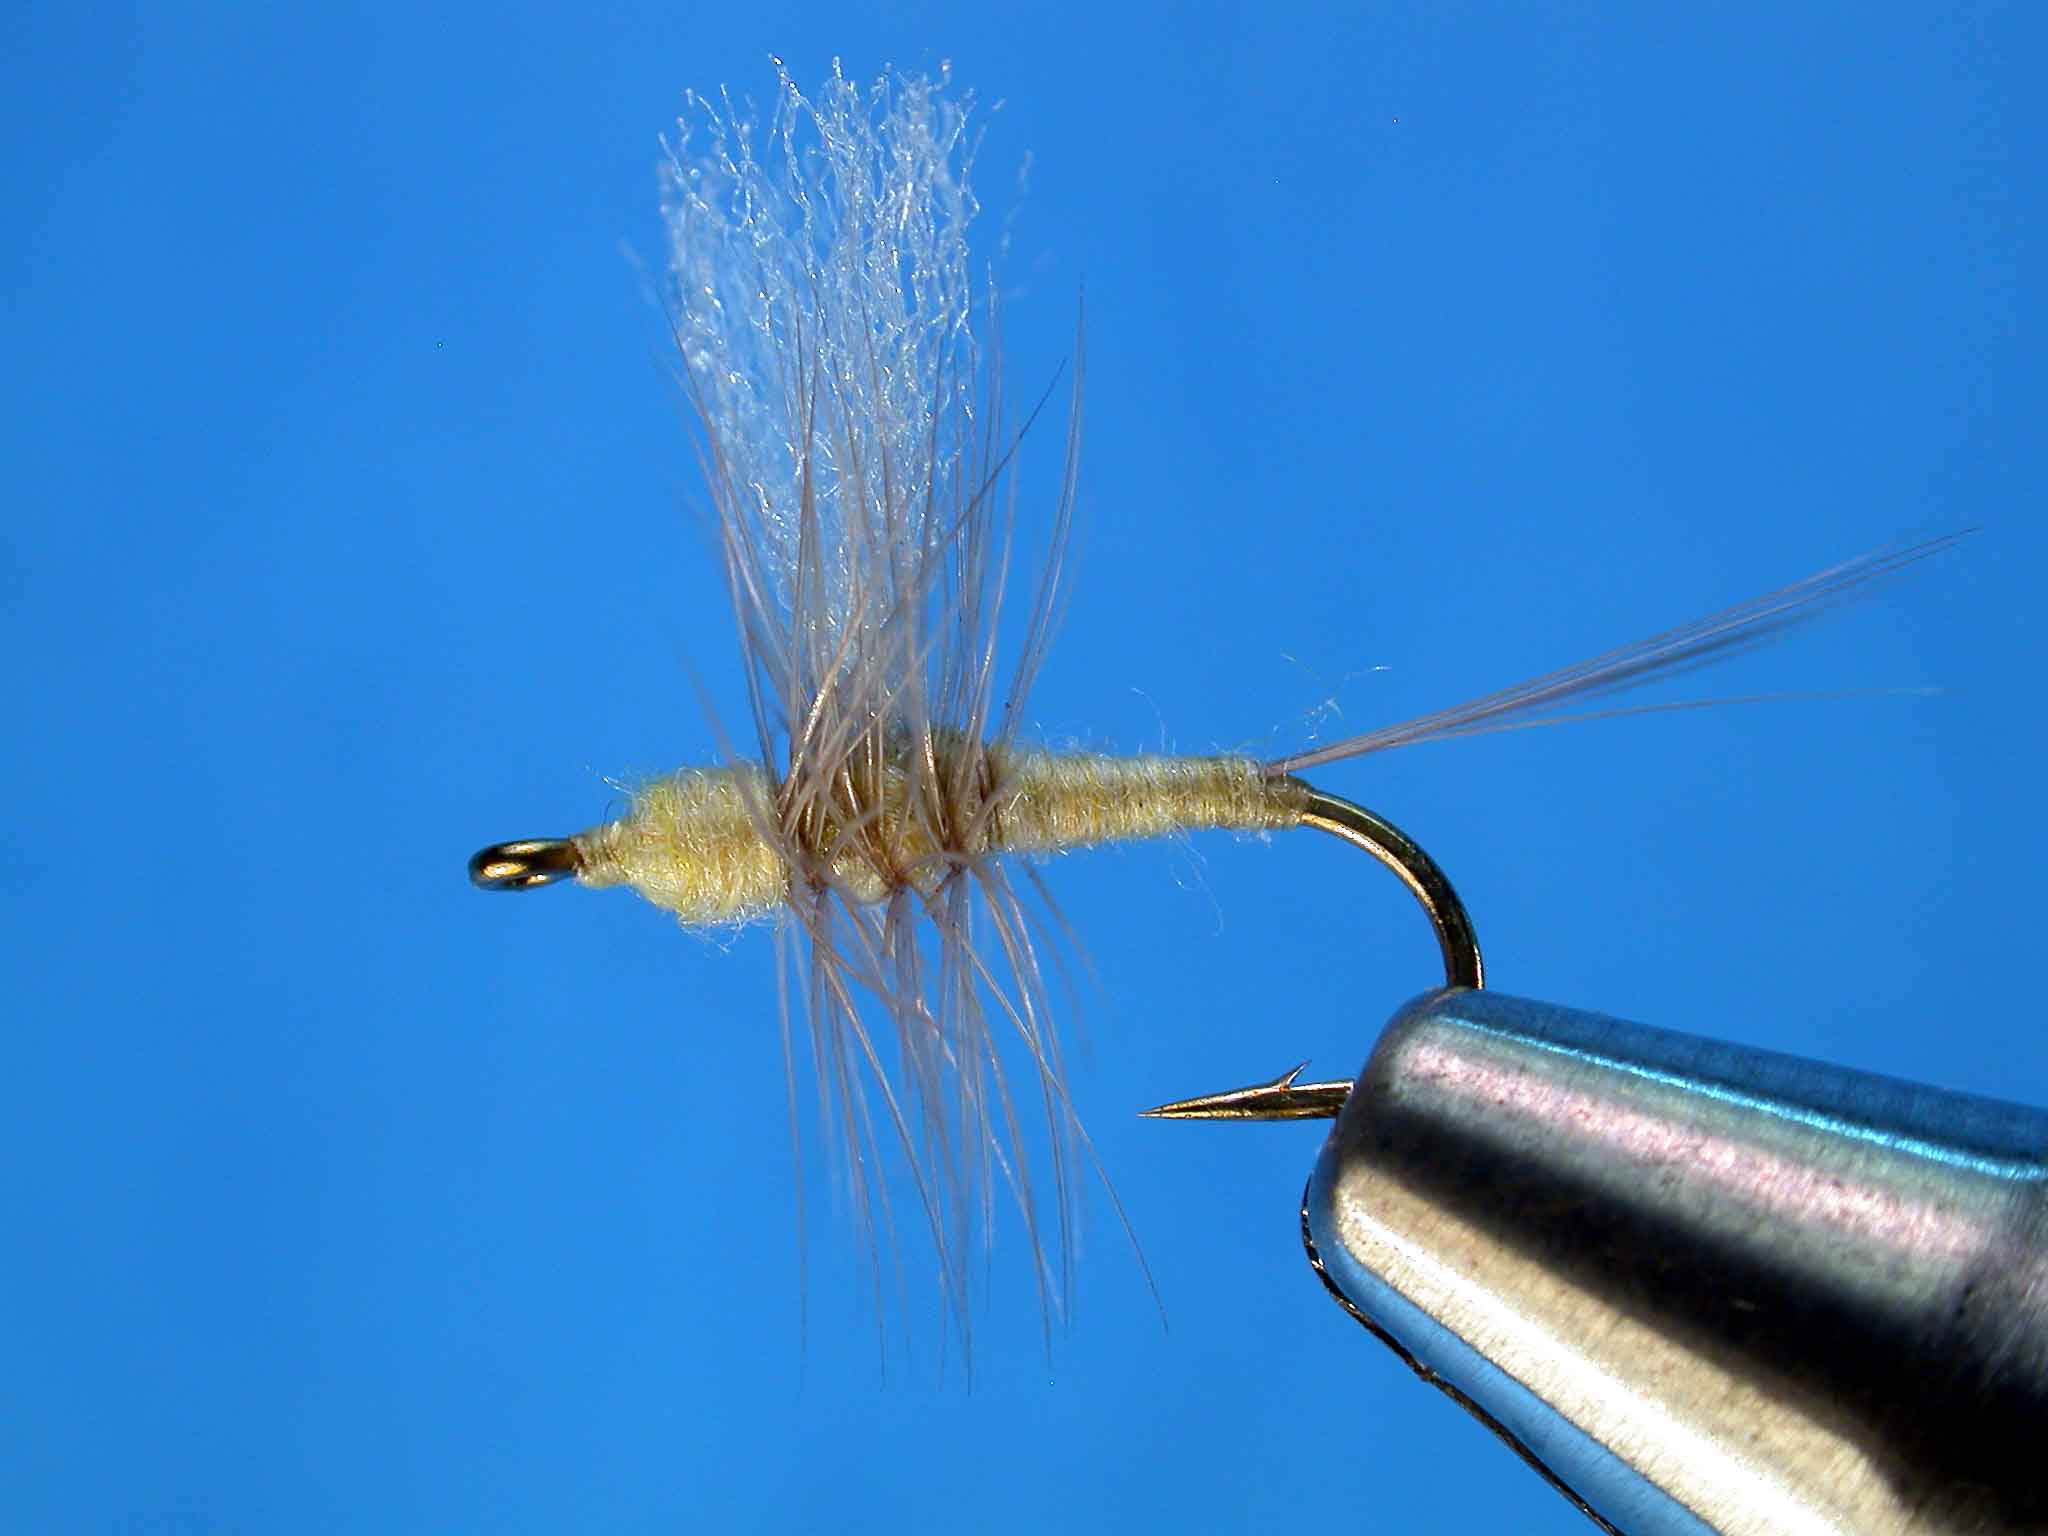
Hook: TMC 100 #16-24
Thread: UNI 8/0 Light Cahill
Tail: Blue Dun Hackle Fibers
Wing: Light Dun Poly Yarn
Hackle: Blue Dun
Abdomen: Pale Yellow Superfine Dubbing
Thorax: Pale Yellow Superfine Dubbing
Glue: Vinyl Cement
Step 1
Attach the tying thread at the seventy-five percent point and wrap a thread base back to the bend. Once at the bend, build a few wraps of thread into a small ball at the point directly above the point on the barb of the hook. This ball will help to splay the tails in the next steps.

Step 2
Select six or eight spade hackle fibers and peel them from the quill, being careful to keep the tips even. Place the hackle fibers on the hook so the tips extend beyond the bend of the hook about one shank length. Bind the hackle fibers to the top of the shank with a couple turns of thread just in front of the thread ball.

Step 3
Wrap the tying thread back over the tailing fibers right up to the base of the thread ball. As you wrap, the fibers will spay out across the ball forming a fan shaped tail.

Step 4
Wrap forward over the butt ends of the tail fibers to the midpoint on the hook and clip the excess there.

Step 5
Continue forming a thread base from the mid point on the shank up to the hook eye and back again to the sixty-percent point.

Step 6
Clip and brush out a clump of poly yarn. About half the strand that comes off the card is about right for a size 16. Tie this clump in on top of the hook at the sixty percent point.

Step 7
Clip the butt ends of the poly yarn at an angle as shown. This angle will help to form the body taper later.

Step 8
Bring the thread to the front of the wing and build a small thread dam to prop the wing upright. Do NOT post the wing; just build the thread dam to stand it up.

Step 9
Select a hackle feather that has fibers equal to about one and a half hook gaps. Prepare the feather by stripping the butt end so the quill is exposed for a length of about two thirds of a shank length. Tie the hackle feather in with the outside of the feather up, in front of the wing and wrap back over the stem with the thread to the base of the wing.

Step 10
Pull the hackle feather straight up so it is parallel to the wing. It tangles with the wing a bit and should stay out of the way in the meantime.

Step 11
Apply a thin strand of dubbing to the thread and begin wrapping it with the first turn of dubbing at the bend of the hook. Work the dubbing forward to the forty percent point on the hook. You should still have a length of dubbing on the thread during this process. Stay with me, it will all make sense in a minute.

Step 12
Pull the hackle feather back along the hook shank and bind it down with the dubbed thread as you continue forward with the dubbing.

Step 13
Continue forward with the dubbing (over the bare hackle stem) up to, and in front of, the wing. Stop the dubbing at the seventy-five to eighty percent point, leaving a bit of bare shank in front of it.

Step 14
Place a drop of thin Vinyl Cement at the base of the wing.

Step 15
Allow the cement to bleed down into the dubbing at the base of the wing as shown. Spread the wing into a fan shape while the cement is still wet.

Step 16
Quickly now, before the cement dries, palmer the hackle forward with two or three turns behind the wing and two or three in front, right over the wet cement. Tie off and clip the hackle feather on the bare shank in front of the dubbing.

Step 17
Make a few turns of thread to cover the stub end of the hackle feather at the front. Note the space between the front of the hackle and the hook eye.

Step 18
Apply another thin strand of dubbing to the thread and wrap it from the rear edge of the hook eye to the base of the wing and back again, forming the tapered thorax as shown.

Step 19
Whip finish and clip the thread.
Step 20
Trim a notch out of the bottom of the hackle forming a V shape cut out. Test the fly on a hard surface to make sure it sits upright.
